We are almost done redecorating the nursery and I cannot wait to share it with you! However, today I am going to share with you one of our recent DIY projects. I will be sharing how we made our DIY No Sew Drop Cloth Crib Skirt. It’s so easy! The best part is, it took me less than two hours to complete and cost just over $10!
Disclosure: This post may contain affiliate links, which means we may receive a commission if you click a link and purchase something. Please check out our disclosure policy for more details.
DIY No Sew Drop Cloth Crib Skirt

I recently bought five of these 6’x9′ Canvas Drop Cloths from Walmart, and bleached them for use in the nursery!
Four of them will be used as no-sew drop cloth curtains (post coming soon!), and one is for today’s project! I used Cami from Tidbits tutorial on How to Bleach a Drop Cloth, however, I modified it slightly so that I could do it outdoors.
I used a large plastic storage tub and bleached them in two separate batches so that they had plenty of room. Then, I used a 5 gallon paint stir-stick to agitate them every hour or so. Using a bleached drop cloth is certainly NOT required for this project, but I wanted the canvas to be lighter in the nursery.
**One thing to note when bleaching drop cloths is to make sure that they are 100% cotton drop cloths or they will not bleach!
Material Needed:
- Canvas Drop Cloth
- Staple gun (I prefer to use this Stanley Electric Staple Gun)
- Measuring Tape
- Fabric Scissors
Instructions:
- Measure the length from the mattress support to the floor (you will want to inset the fabric at least 3″ to make sure that the staples are completely hidden underneath the mattress). The length I decided to go with was 18″. I measured slightly long because I wanted the skirt to have full ruffles that puddle up just a bit.

2. Cut fabric to length.

3. Using your measuring tape, inset the fabric 3″ and staple in the corner to secure it. 

4. Attach the other end of the fabric in the opposite corner, again insetting it 3″. Then begin laying out your ruffles by pinching the fabric and folding it over. Continue to do this with the entire strip of fabric. Make sure your ruffles are evenly spaced.

5. Double check that the fabric is inset 3″ in several places along the side and adjust before stapling.

6. Place one staple in each ruffle at the fold to secure it.

7. Repeat along each side of the crib (my crib will be going against a wall so I only did the front, and two sides). For the long side of the crib, you may need to use two strips of fabric to get the desired amount of ruffles. If that is the case, simply fold the raw edges in and staple. Make sure to overlap the strips of fabric so that the break in the fabric is not noticeable.
That’s it! Wasn’t that easy?!

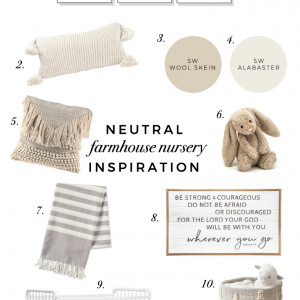
I will be posting a full nursery reveal very soon, but in the meantime, you can check out my Neutral Farmhouse Nursery Inspiration board to see more details about the room!


Leave a Reply